Let’s take a look at some of the features of board design and what makes up the best kiteboard for beginners.
Board Type
In another article I list and review a number of boards that are ideal for beginners.
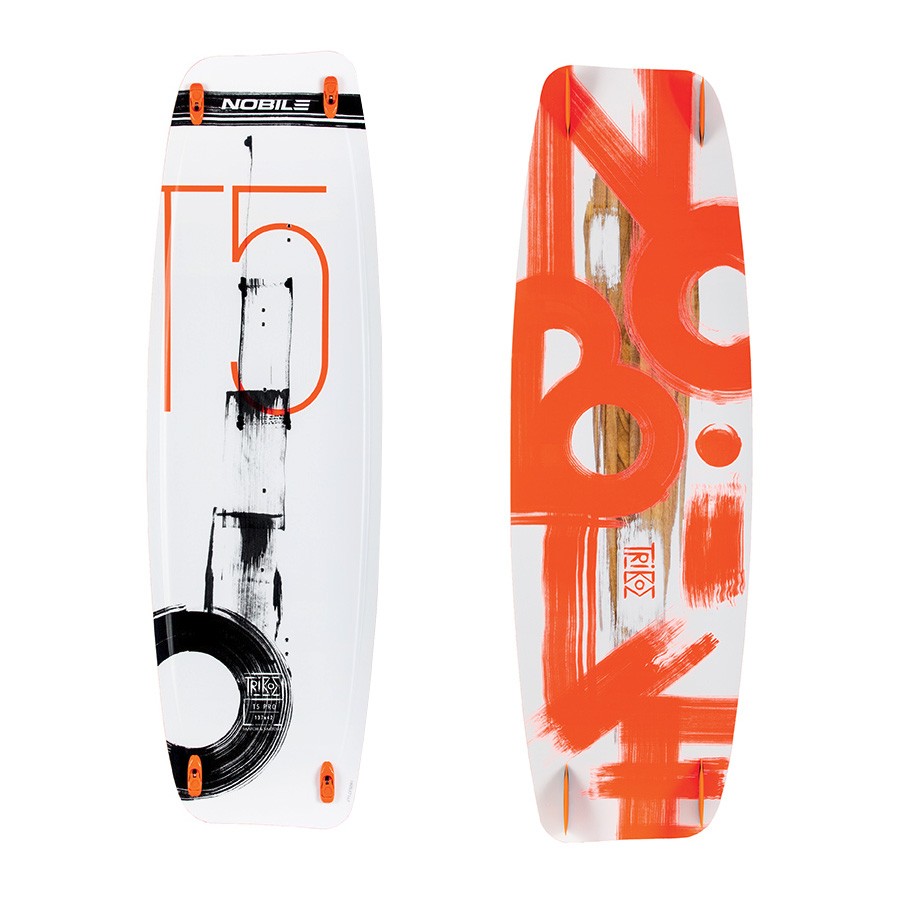
Almost without exception, the board you’ll learn on will be a twin-tip.
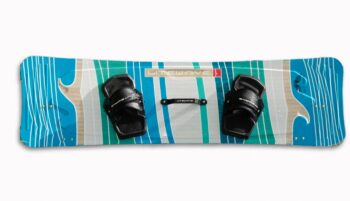
So this is a generally rectangular board, usually (although not necessarily) symmetrical. There’ll be two small fins at each end, a pair of foot-straps and foot pads, and a grab handle in the middle.
Your feet stay in the foot straps whichever way you’re riding and it can be ridden to your left or right without having to move your feet.
Fixed boots can be used instead of foot straps, but this isn’t recommended for beginners as it makes getting to the water difficult and it’s a lot more difficult to get your feet out when you need to.
All twin tips should have these features although some riders will remove the grab handle. I must admit, I’ve never quite understood why, apart from for appearance.
There are then a number of different design features, which change the riding characteristics of the board.
Let’s have a look at these:
Size
Of course size matters!
Twin-tips come in lengths anything from about 120cms to 160cms. And widths vary from about 30cms to about 50 cms.
Generally you would choose a board based on length. The width usually goes automatically with whatever length of board you choose, although some board manufacturers offer a choice of widths with some boards.
As a beginner you’ll want a board toward the larger end of the scale, but the largest boards will really only be suitable during your early learning stage and will not be of much use after that.
The size you choose will depend on your size and weight, the wind and water conditions you are likely to be out in most. But it will also depend on whether you are willing to replace the board soon after you’ve mastered getting up on the board and riding in both directions.
A very large board makes it easier to get up in light winds and will plane very easily. (This is when the board starts moving at enough speed so that only a small part of the board is in contact with the water – imagine a power boat chugging along slowly, low in the water, compared with rising up on it’s rear end at speed).
However, a large board is more difficult to control in stronger winds and won’t turn as easily.
To give an example, a person weighing say 50kg could consider a board 135cms long to be a large board. They need less board surface area to get planing than a person weighing 90kg, who would find this board to be suited to most wind conditions.
I would tend to steer you toward a board which is slightly large but small enough to be suited to your progression stages. It could then be kept as a light wind board once you progress to a smaller board for stronger winds.
So the 50kg person might opt for a board say 128-134 cms long and the 90kg person for one 134-140cms.
The smaller end of the scale will make it slightly more difficult to get going in the very early stages but will mean the board is usable for a lot longer as you progress.
And if you were fairly confidently getting up and running during your lessons, the first board you buy could even be the one you continue using for years.
Be guided by the size of the board you used when you were having lessons. If you got up and running on this pretty easily after a few lessons, then you can probably buy one that’s 2-4cm shorter.
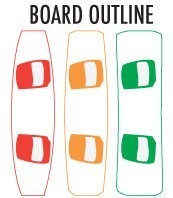
Profile/Outline
This is the shape of the board when looked at from above when it’s flat on the ground.
Board profiles vary from virtually rectangular to almost oval in shape with curved edges. The shape of the ends of the board need not bother you too much at this stage, but may be straight or have indents or “V”s cut in to aid their flow through the water.
The best kiteboard for a beginner in terms of profile will have fairly straight edges. This helps with early planing and keeping the board going in a straight line. But don’t be put off buying a board that has some curve in the edges, particularly if you’ll be riding in choppy waters. The curved edges help prevent the board from catching in small chop and allow you to ride through it better.
Some boards are slightly asymmetrical with a straighter back edge (heelside) and more curved front edge (toeside). This helps with edging the board into wind when riding normally, with your toes forward. The curved front edge helps with a move known as toe-side riding, where you flip the board round so that the kite is behind you and you’re leaning forward rather than backwards. This won’t be a disadvantage to you as a beginner but neither will it add anything to your early progression.
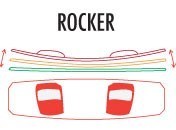
Rocker
This is the shape of the board when viewed from the side and is the curvature between the centre of the board and the tips.
A fairly flat rocker shape will help with early planing and allow you to get up in lighter winds. It will also help you to ride upwind, which is an essential skill you’ll need to master in the early days – it allows you to get back to where you started.
Boards with more pronounced rocker are suited to choppy or wave conditions so some compromise is worth considering if you’ll be riding in those conditions in your early days.
Flex
Boards can vary from being almost totally rigid to having a good degree of flex (bendiness). Take a board and stand it up on a tip, then push down and this will give you an idea as to the level of flex. A very stiff board has advantages when it comes to more advanced wakestyle tricks where an explosive “pop” off the water is good.
However, a degree of flex makes the board more forgiving and easier to ride in chop and on waves. It also makes it more comfortable to land from big jumps as the flex absorbs some of the impact on landing.
A lot of modern boards have “dynamic” flex where the flex gets greater towards the tips than at the middle. This is an excellent compromise between the ability to jump the board and comfort in chop and waves and on landing.
For years now I’ve been using a Nobile board with just such characteristics and have never felt limited by it.
So some flex is definitely an advantage in either a learner board or subsequent boards.
Bottom Shape
This is the shape of the bottom surface of the board. It can be flat, channeled or have subtle concaves. Flat will help with early planing but some concave will help with speed across the water and jumping. Channels also help with speed and keeping the board going forwards in strong winds.
A flattish bottom shape is preferable in your first board.
Foot-straps and Pads
Often overlooked, but important. These are what keeps you attached to the board and your only (hopefully!) point of contact with it. So they need to feel snug and comfortable. If possible try out different makes before you buy. Most manufacturers also offer smaller sized pads and straps to suit female feet or youths/children.
Like most things in kiteboarding, straps and pads have come a long way and the best ones now feel like a comfy pair of shoes, with memory-foam pads and snug fitting straps. This all helps keep the board attached to your feet.
It’s not a deal-breaker if you’re looking at a second-hand board, as pads and straps can be bought as a separate item and are generally universal in fit, so will fit most boards. Do check this with the seller though as it’s not a given.
Think Forward
Once you’ve mastered the first stages of water-starting and are able to ride in both directions and upwind, you will progress very quickly, so it’s worth buying a board that will work when you start progressing to jumps and other tricks. You can get to that stage very quickly.
As with kites there are many board designs that will get you through your first early steps and then give you years of fun. Most kiters are recreational and will never get involved in competitions so some of the advanced features on the more expensive boards will be surplus to requirements. There are also some great boards available second-hand as they are very hard-wearing and don’t usually get damaged in the way kites and control-bars and lines can, so it’s quite normal for kiters to have a number of boards depending on the conditions or style of riding they feel like doing on a given day.
Another thing worth considering is that in lighter winds a bigger board will allow you to get going on a smaller kite and can be a less expensive option than having an extra big kite for light winds. So the bigger board you get for learning on is useful to keep hold of if you end up progressing to a smaller one.
I would steer you away from the mistake I made when I started and bought a huge 148cm door-sized board, which was great for getting up and moving easily on my first few sessions, but was pretty uncontrollable at any speed and needed to be replaced within a few weeks.
In another article ” Kiteboards for Beginners” I feature a number of boards that would be suitable.
Here are some other articles you might find helpful:
I hope you’ve found this article helpful, and if you have any comments or questions, feel free to leave them below. I always reply to questions and really welcome them.
